지난 포스트에 이어서 github에서 issues 생성, pull request 생성, review 등록 등의 이벤트가 발생했을 때 Webhook을 통해 정보를 받아서 처리하고 line Notify API로 해당 이벤트의 정보를 알림 받는 방법에 대해서 알아본다.
등록된 이벤트 확인방법
아래와 같 API를 호출해보면 여러가지 정보들을 확인할 수 있다. 그 중에 events에 설정된 이벤트들은 해당하는 이벤트가 발생했을 때 Webhook을 통해 관련된 정보를 전달받을 수 있다. 아래의 예시는 기본적으로 설정돼 있는 것으로 push 이벤트가 하나 등록되어 있다.
https://api.github.com/repos/<계정이름>/<저장소이름>/hooks
$ curl -u cjh5414 https://api.github.com/repos/Nelp-dev/Nelp/hooks
Enter host password for user 'cjh5414':
[
  {
    "type": "Repository",
    "id": 13608196,
    "name": "web",
    "active": true,
    "events": [
      "push"
    ],
    "config": {
      "content_type": "json",
      "insecure_ssl": "0",
      "url": "http://nelp.kr/postreceive"
    },
    "updated_at": "2017-05-05T07:41:22Z",
    "created_at": "2017-05-05T07:41:22Z",
    "url": "https://api.github.com/repos/Nelp-dev/Nelp/hooks/13608196",
    "test_url": "https://api.github.com/repos/Nelp-dev/Nelp/hooks/13608196/test",
    "ping_url": "https://api.github.com/repos/Nelp-dev/Nelp/hooks/13608196/pings",
    "last_response": {
      "code": 200,
      "status": "active",
      "message": "OK"
    }
  }
]
이벤트 종류
Webhook에 등록할 수 있는 이밴드들의 종류는 여러가지가 있다. 아래의 링크에서 확인할 수 있다. 링크에 들어가서 각각의 이벤트들을 클릭해보면 더 자세한 내용을 확인할 수 있다.
이벤트 등록
Webhook에 이벤트를 등록하기 위해서는 원하는 이벤트를 add_events에 등록하여 API를 호출해주면 된다. API를 요청하는 URL은 위의 이벤트 확인방법에서의 url 값을 사용하면 된다.
$ curl -u cjh5414 https://api.github.com/repos/Nelp-dev/Nelp/hooks/13608196 -X PATCH -d '{"add_events": ["pull_request"] }'
Enter host password for user 'cjh5414':
{
  ...
  "events": [
    "push",
    "pull_request"
  ],
  ...
}
호출 후에는 요청이 반영된 결과를 바로 보여주는데 events에 pull_request 항목이 추가된 것을 확인할 수 있다.
Webhook Event 처리
이제 특정 이벤트가 발생했을 때 서버로 날라오는 JSON 형태의 요청을 처리해주면 된다. https://developer.github.com/v3/activity/events/types/ 을 참고해서 필요한 정보들을 확인할 수 있다. 각각의 이벤트들의 예시가 잘 나와있어서 쉽게 사용할 수 있다.
아래의 예제는 Pull Request 이벤트가 Open 됐을 경우이다.
from flask import Flask, request, jsonify
import urllib3

app = Flask(__name__)


def notify_to_line(message):
    # ...


def open_pull_request():
    json_dict = request.get_json()
    message = 'Open Pull Request ' + '#' + str(json_dict['number']) + '\n'
    message += (json_dict['pull_request']['user']['login'] + '\n')
    message += (json_dict['pull_request']['title'] + '\n')
    message += (json_dict['pull_request']['html_url'] + '\n')
    notify_to_line(message)


@app.route('/postreceive', methods=['POST'])
def hello_world():
    if request.headers['X-GitHub-Event'] == 'pull_request' and request.get_json()['action'] == 'opened':
        open_pull_request()
        return 'success'
    else:
        return 'hello'


if __name__ == '__main__':
    app.run()
Pull Request Event가 생성됐을 때 알림을 받기 위해 request header의 X-GitHub-Event 값이 pull_request 인지, action 값이 opened 인지를 확인한다.
open_pull_request() 함수에서 필요한 정보들을 String 형태로 저장하고 notify_to_line()으로 전달하여 line 메세지로 알림을 보내도록 한다.
LINE_NOTIFY_URL = 'https://notify-api.line.me/api/notify'
LINE_HEADERS = {
    'Authorization' : 'Bearer ' + 'line_notify_token'
}

def notify_to_line(message):
    try:
        http = urllib3.PoolManager()
        response = http.request(
            'POST',
            LINE_NOTIFY_URL,
            headers=LINE_HEADERS,
            fields={'message': message}
        )
        print('Response HTTP Status Code: {status_code}'.format(
        status_code=response.status))
    except urllib3.exceptions.NewConnectionError:
        print('Connection failed.')
Line으로 알림 메세지를 보내는 방법은 Line Notification with python 을 참고하면 된다.
Line 그룹인 경우에는 채팅방으로
Line Notify를 초대해줘야지 알림을 받을 수 있다.
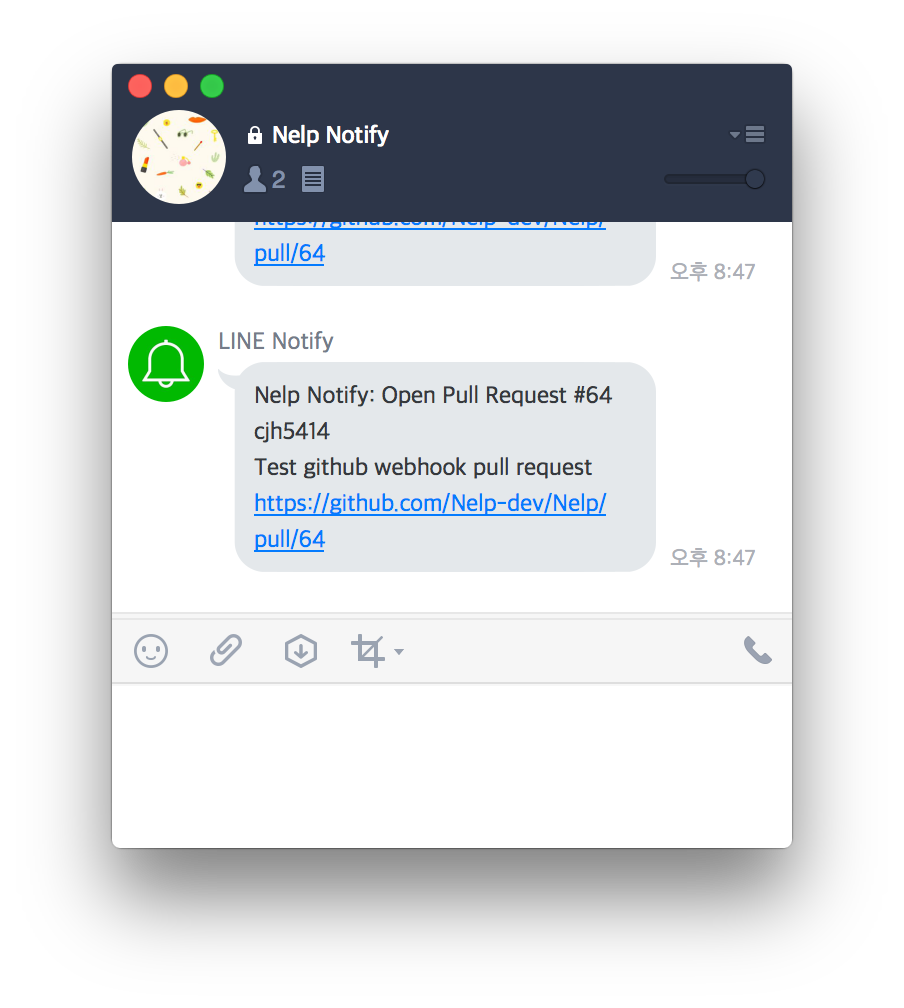
Line Notify 결과