지난 포스트(pytest doc 번역 - Installation and Getting Started)에 이어서 pytest Documentation의
The writing and reporting of assertions in tests라는 주제의 내용을 번역했다. 이해가 부족한 부분은 예제와 설명을 추가했다. pytest에서 assertions을 사용하는 방법과 실패 시 출력되는 결과에 대한 내용이다.
assert statement를 이용한 assertion
pytest는 python 표준인 assert키워드를 이용하여 test의 예상값과 결과값을 확인한다. 예를들면, 아래와 같이 작성할 수 있다.
test_assert1.py
def f():
    return 3

def test_function():
    assert f() == 4
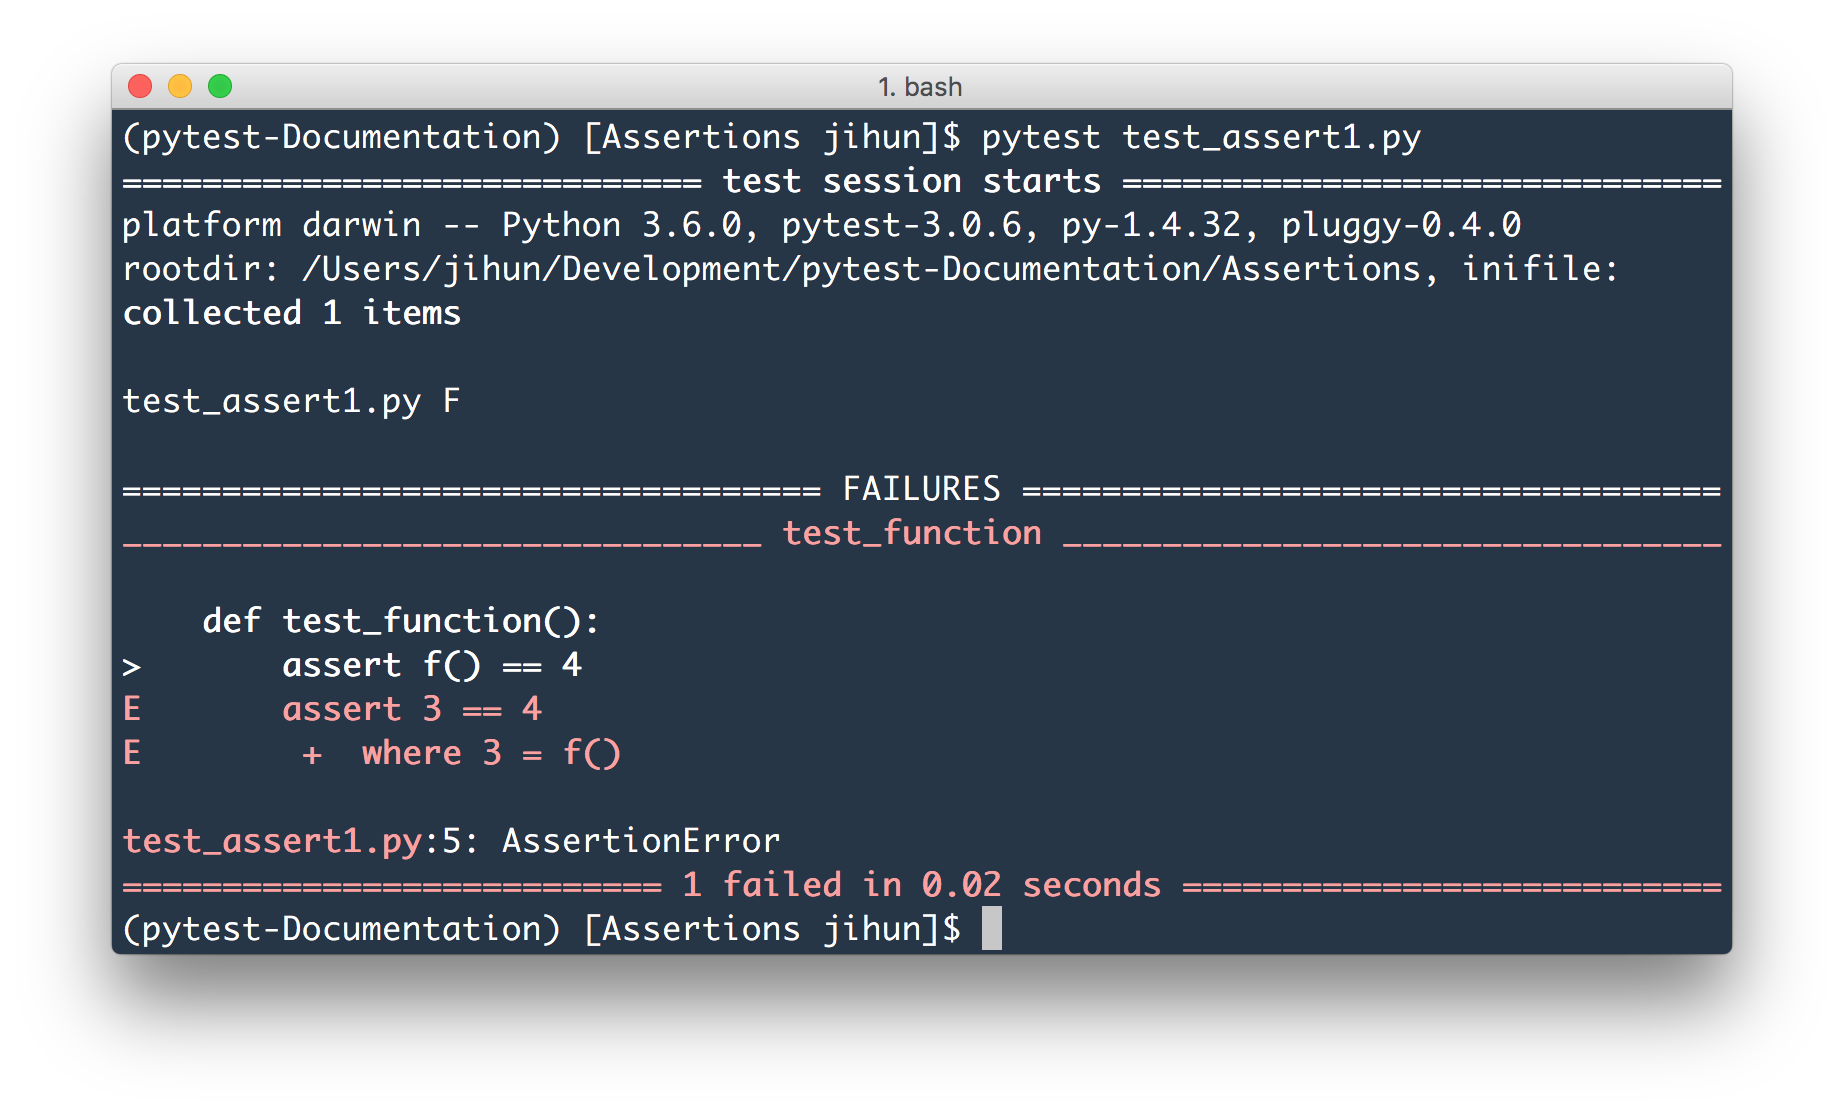
assert에서 함수가 특정 값을 반환하기를 기대하는데, 만약 이 assertion이 실패하면 아래와 같이 호출된 함수의 반환 값을 확인할 수 있다.

pytest는 호출, 속성, 비교, 이진 및 단항 연산자 등을 포함한 가장 일반적인 하위 표현법으로 값을 표시하는 것을 지원한다. (Demo of Python failure reports with pytest 참고). 이는 introspection information을 잃지 않으면서 boilerplate code 없이 관용적인 python 구문을 사용할 수 있게 해준다.
그러나, 아래와 같은 assertion으로 메세지를 명시 한다면,
assert a % 2 == 0, "value was odd, should be even"
assertion introspection은 전혀 나타나지 않으며 메세지만 traceback에 간단하게 보여진다.
예외처리에 대한 Assertion
예외처리에 대한 assertions을 작성하기 위해 pytest.raises를 context manager로 사용할 수 있다.
test_exception1.py
import pytest


def test_zero_division():
    with pytest.raises(ZeroDivisionError):
        1 / 0
그리고 실제 예외 정보에 접근해야 할 필요가 있다면 아래와 같이 사용할 수 있다.
test_exception2.py
import pytest


def test_recursion_depth():
    with pytest.raises(RuntimeError) as excinfo:
        def f():
            f()
        f()
    assert 'maximum recursion' in str(excinfo.value)
테스트를 돌려보면 f()가 무한으로 재귀되면서 RuntimeError을 발생시킨다. excinfo.value에 maximum recursion이라는 메세지를 포함하기 때문에 테스트를 통과한다.
excinfo는 ExceptionInfo의 객체이며 실제 발생한 예외에 대한 래퍼이며, 주요 관심 대상은 .type, .value, .traceback 이다.
version 3.0 부터
context manager 형태에서는 message 인자를 사용하면 원하는 실패 메세지를 명시할 수 있다.
test_exception3.py
import pytest


def test_zero_division():
     with pytest.raises(ZeroDivisionError, message="Expecting ZeroDivisionError"):
        pass
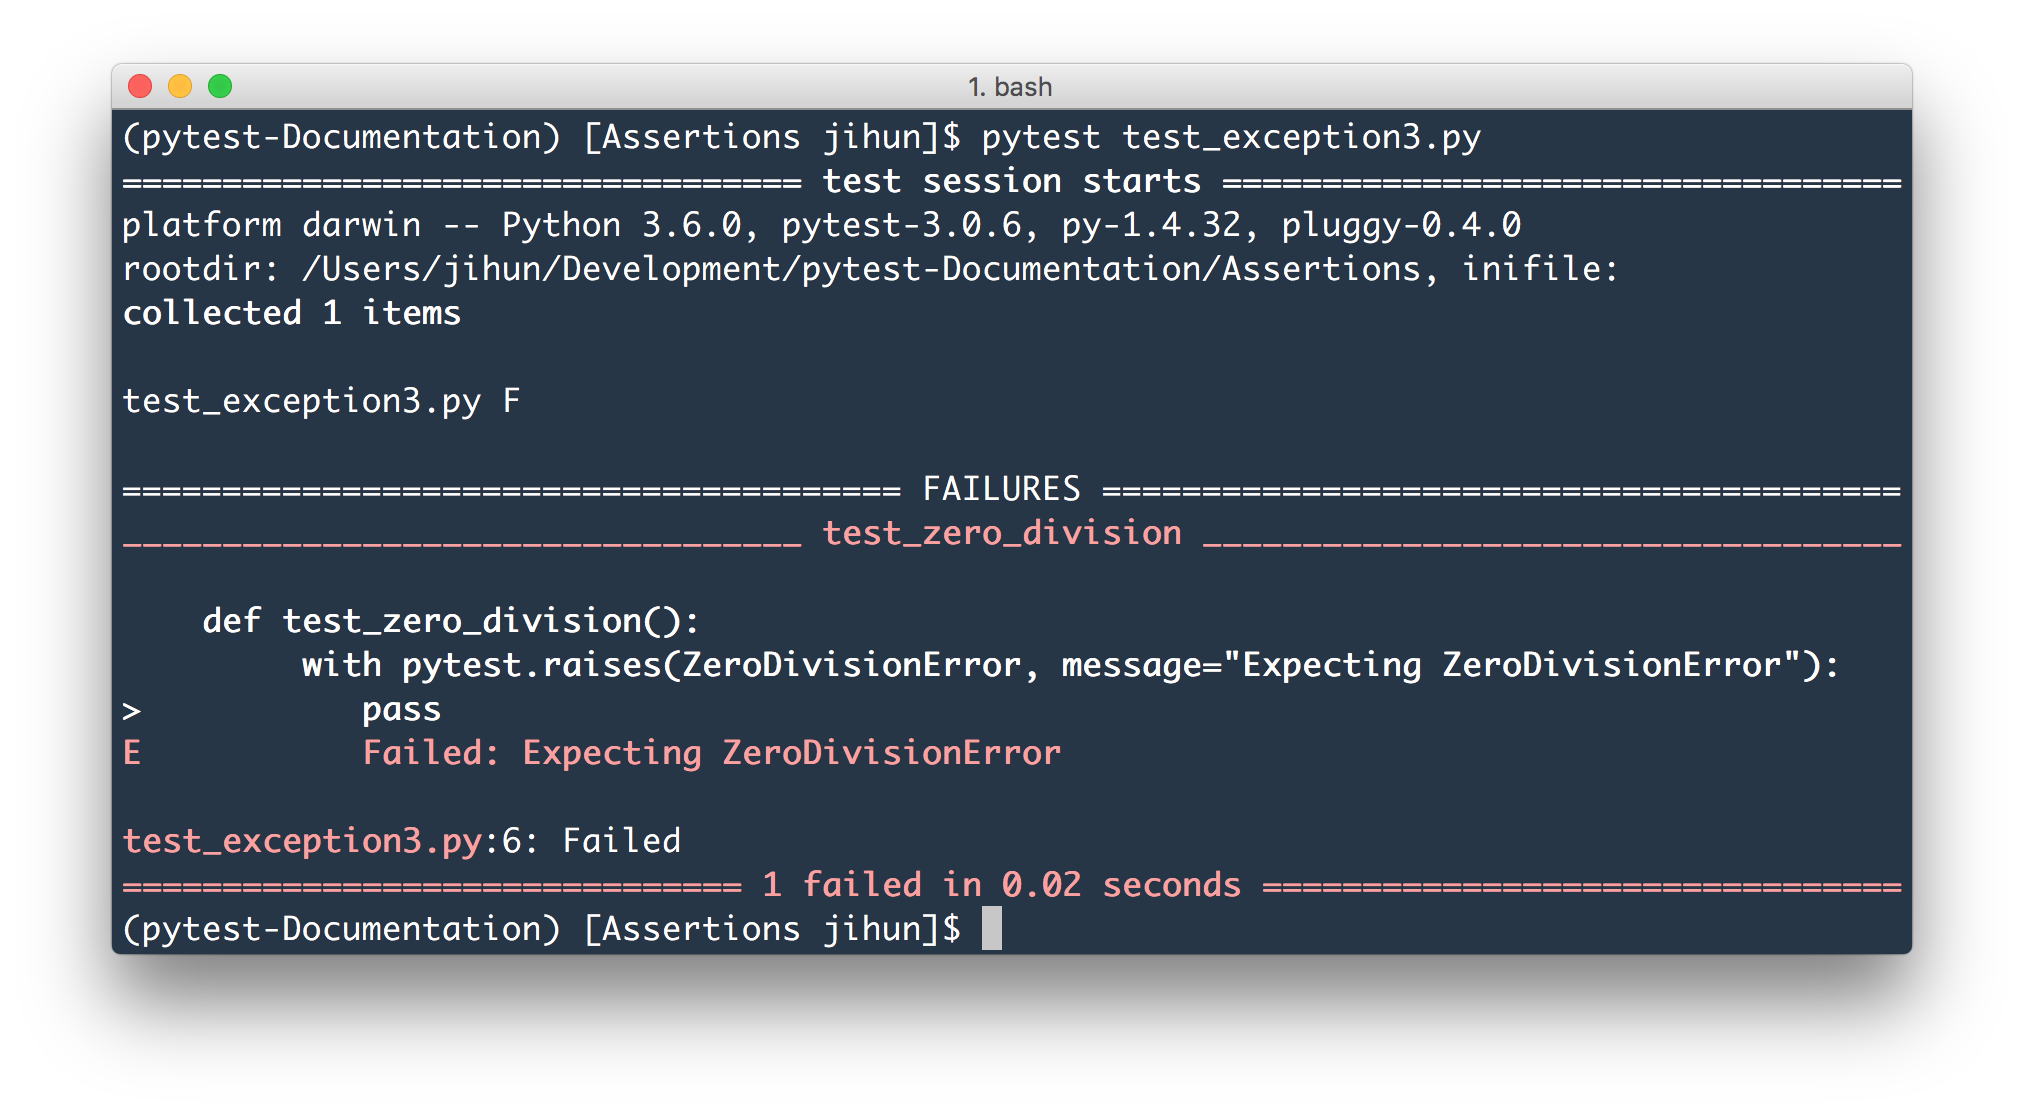
test_exception1.py 의 예제를 위와 같이 약간 변경한 후에 테스트를 실행해보면 message로 지정한 실패 메세지를 확인할 수 있다.

만약 Python 2.4 버전에서 동작하도록 코드를 작성하고 싶다면 아래의 두가지 방법으로 예외 처리를 테스트 할 수 있다.
pytest.raises(ExpectedException, func, *args, **kwargs)
pytest.raises(ExpectedException, "func(*args, **kwargs)")
두 가지는 모두 args, kwargs과 함께 func를 실행하고 ExpectedException이 발생하는지를 확인하는 assert문이다. no exception 또는 wrong exception 와 같은 실패 경우의 출력물이 제공된다.
pytest.mark.xfail에 “raises” 인자를 명시해서 사용하면, 단순히 예외가 발생하는 것보다 더 명확한 방법으로 테스트가 실패하는 것을 확인할 수 있다.
@pytest.mark.xfail(raises=IndexError)
def test_f():
    f()
pytest.raises을 사용하는 것은 코드가 의도적으로 excepion을 발생시키는 것을 테스트 할 때 좋은 방법이고, 반면에 @pytest.mark.xfail는 고쳐지지 않은 버그가 문서화 되어있거나 혹은 버그와 의존성이 있는 경우에 사용하는 것이 좋다.
unittest의 TestCase.assertRaisesRegexp함수와 같이 예외의 문자열 표현에서 정규표현식으로 테스트 하기를 원한다면 ExceptionInfo.match 함수를 사용하면 된다.
test_exception4.py
import pytest


def myfunc():
    raise ValueError("Exception 123 raised")

def test_match():
    with pytest.raises(ValueError) as excinfo:
        myfunc()
    excinfo.match(r'.* 123 .*')
match 함수의 매개변수의 정규표현식은 re.search함수와 일치한다. 따라서 위의 예제 excinfo.match('123')는 제대로 동작하여 테스트가 통과한다.
경고문에 대한 Assertion
version 2.8 에 추가됨.
특정한 경고에 대한 Assertion은 pytest.warns을 참고하면 된다.
상황에 맞는 비교 기능 사용하기
version 2.0 에 추가됨.
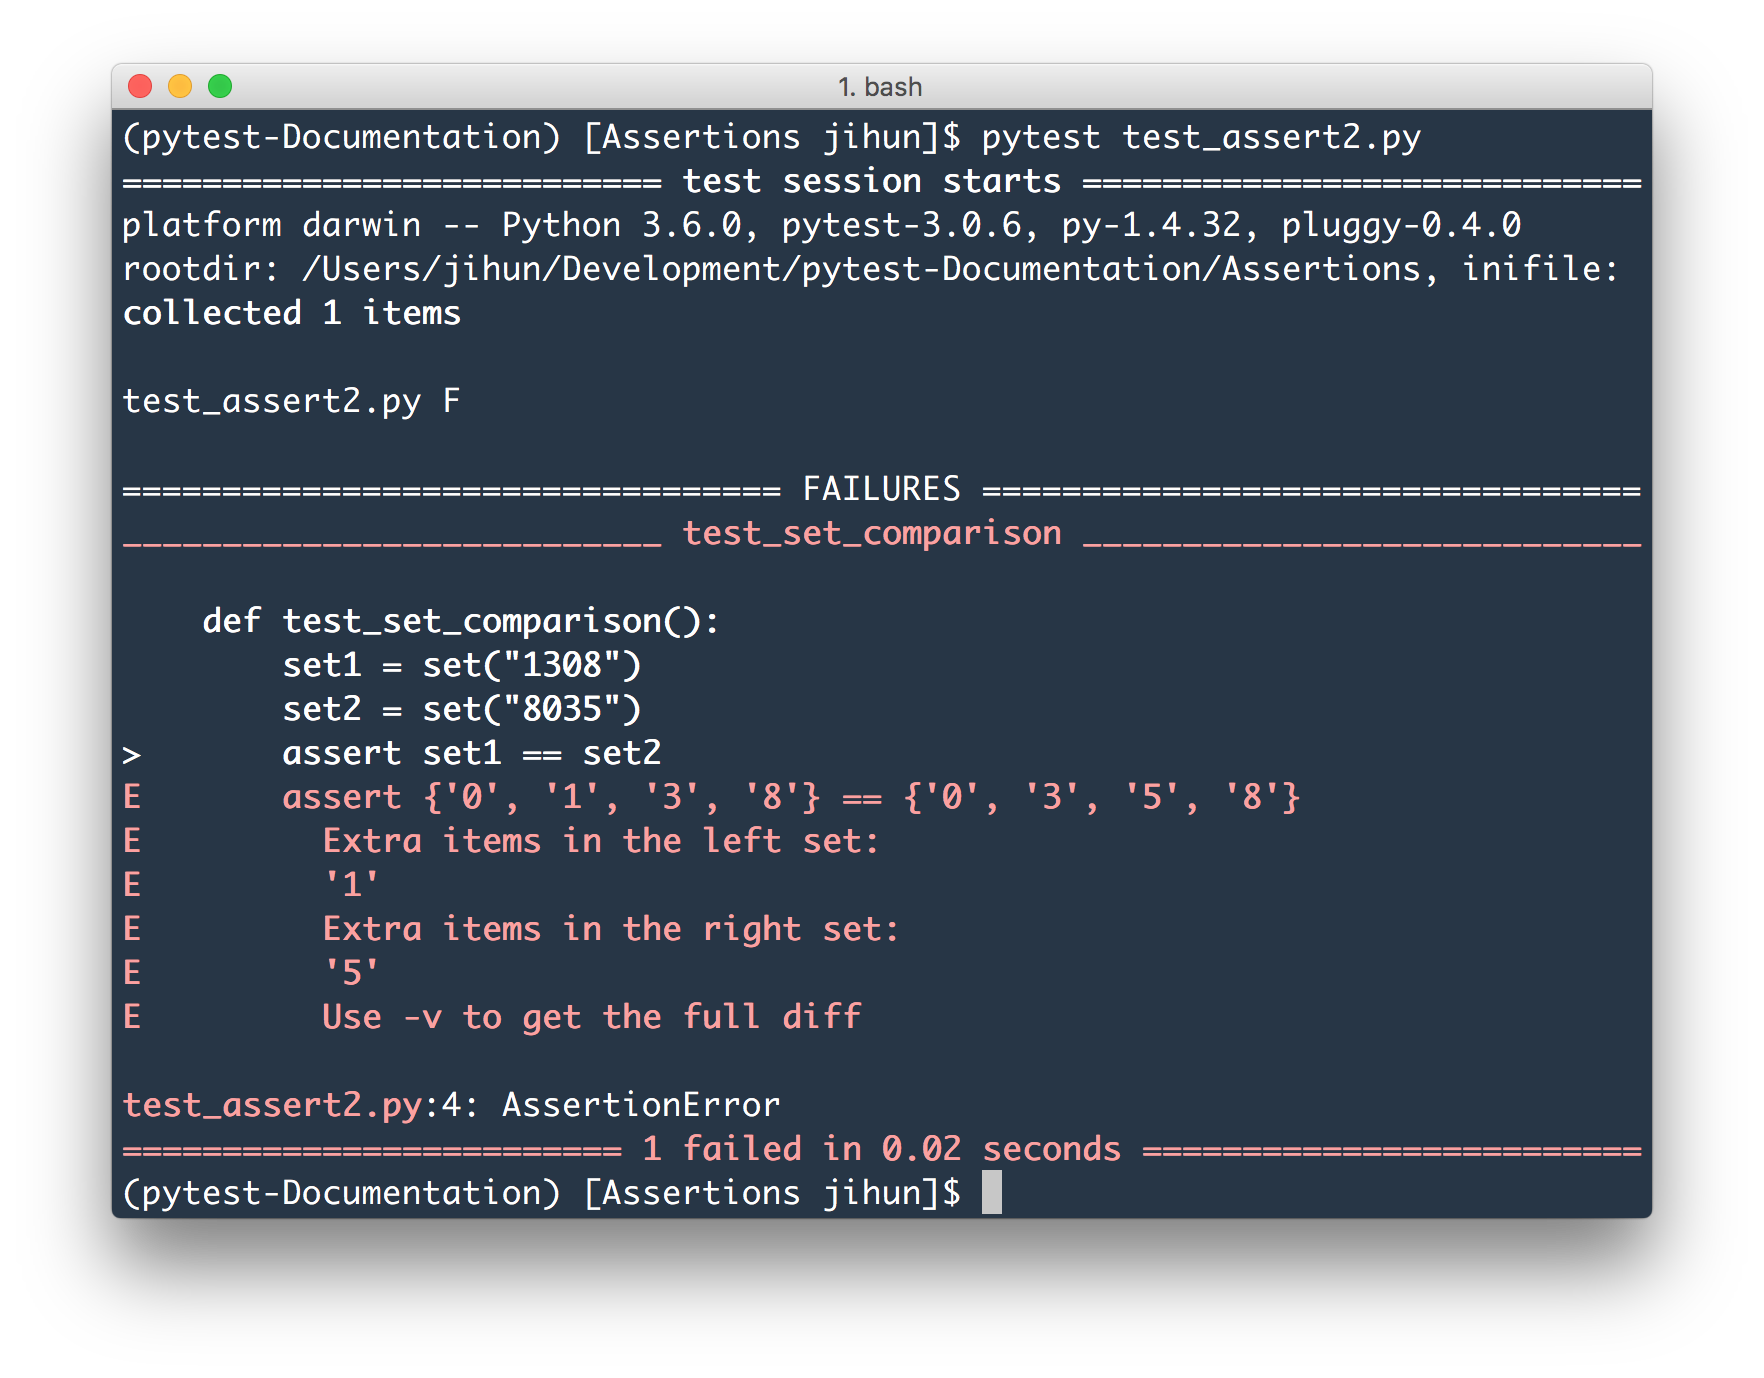
pytest는 비교 구문을 접하면 상황에 맞는 여러가지 정보들을 제공한다. 예를들면,
test_assert2.py
def test_set_comparison():
    set1 = set("1308")
    set2 = set("8035")
    assert set1 == set2
테스트 실행 결과:

다음과 같은 경우에 대해 특별한 비교가 수행 된다.
- 긴 문자열 비교 : 다른 글자들이 표시된다.
>       assert 'foo 1 bar' == 'foo 2 bar'
E       assert 'foo 1 bar' == 'foo 2 bar'
E         - foo 1 bar
E         ?     ^
E         + foo 2 bar
E         ?     ^
- 긴 시퀀스 비교 : 첫 번째로 다른 값의 index가 표시된다.
>       assert [0, 1, 9, 2] == [0, 1, 3, 7]
E       assert [0, 1, 9, 2] == [0, 1, 3, 7]
E         At index 2 diff: 9 != 3
E         Use -v to get the full diff
- 딕셔너리 비교 : 다른 항목들이 표시된다.
>       assert {'a': 0, 'b': 1, 'c': 0} == {'a': 0, 'b': 2, 'd': 0}
E       assert {'a': 0, 'b': 1, 'c': 0} == {'a': 0, 'b': 2, 'd': 0}
E         Omitting 1 identical items, use -v to show
E         Differing items:
E         {'b': 1} != {'b': 2}
E         Left contains more items:
E         {'c': 0}
E         Right contains more items:
E         {'d': 0}
E         Use -v to get the full diff
reporting demo에서 더 많은 예제들을 확인 할 수 있다.
비교 assertion 직접 정의하기
pytest_assertrepr_compare 훅을 구현함으로써 상세한 설명을 커스텀하여 추가하는 것이 가능하다.
pytest_assertrepr_compare(config, op, left, right)
- assert이 실패 했을 때 비교에 대한 설명을 반환하는 함수
custom으로 구현한 설명이 없으면 아무것도 반환하지 않고, 있으면 문자열 목록을 반환한다. 문자열들은 개행 문자로 결합되고 문자열에 포함된 개행 문자는
\n으로 표시된다. 첫번째 줄을 제외하고 모두 약간의 들여쓰기가 되고, 첫번 째 줄에는 첫 번째 문자열이 요약본으로 들어간다.
아래의 conftest.py 예시로 훅을 추가하는 것을 생각해보자. Foo 객체의 설명에 대한 대안을 제공한다.
conftest.py
from test_foocompare import Foo


def pytest_assertrepr_compare(op, left, right):
    if isinstance(left, Foo) and isinstance(right, Foo) and op == "==":
        return ['Comparing Foo instances:',
                '   vals: %s != %s' % (left.val, right.val)]
아래와 같은 테스트 모듈이 주어졌다.
test_foocompare.py
class Foo:
    def __init__(self, val):
        self.val = val

    def __eq__(self, other):
        return self.val == other.val

def test_compare():
    f1 = Foo(1)
    f2 = Foo(2)
    assert f1 == f2
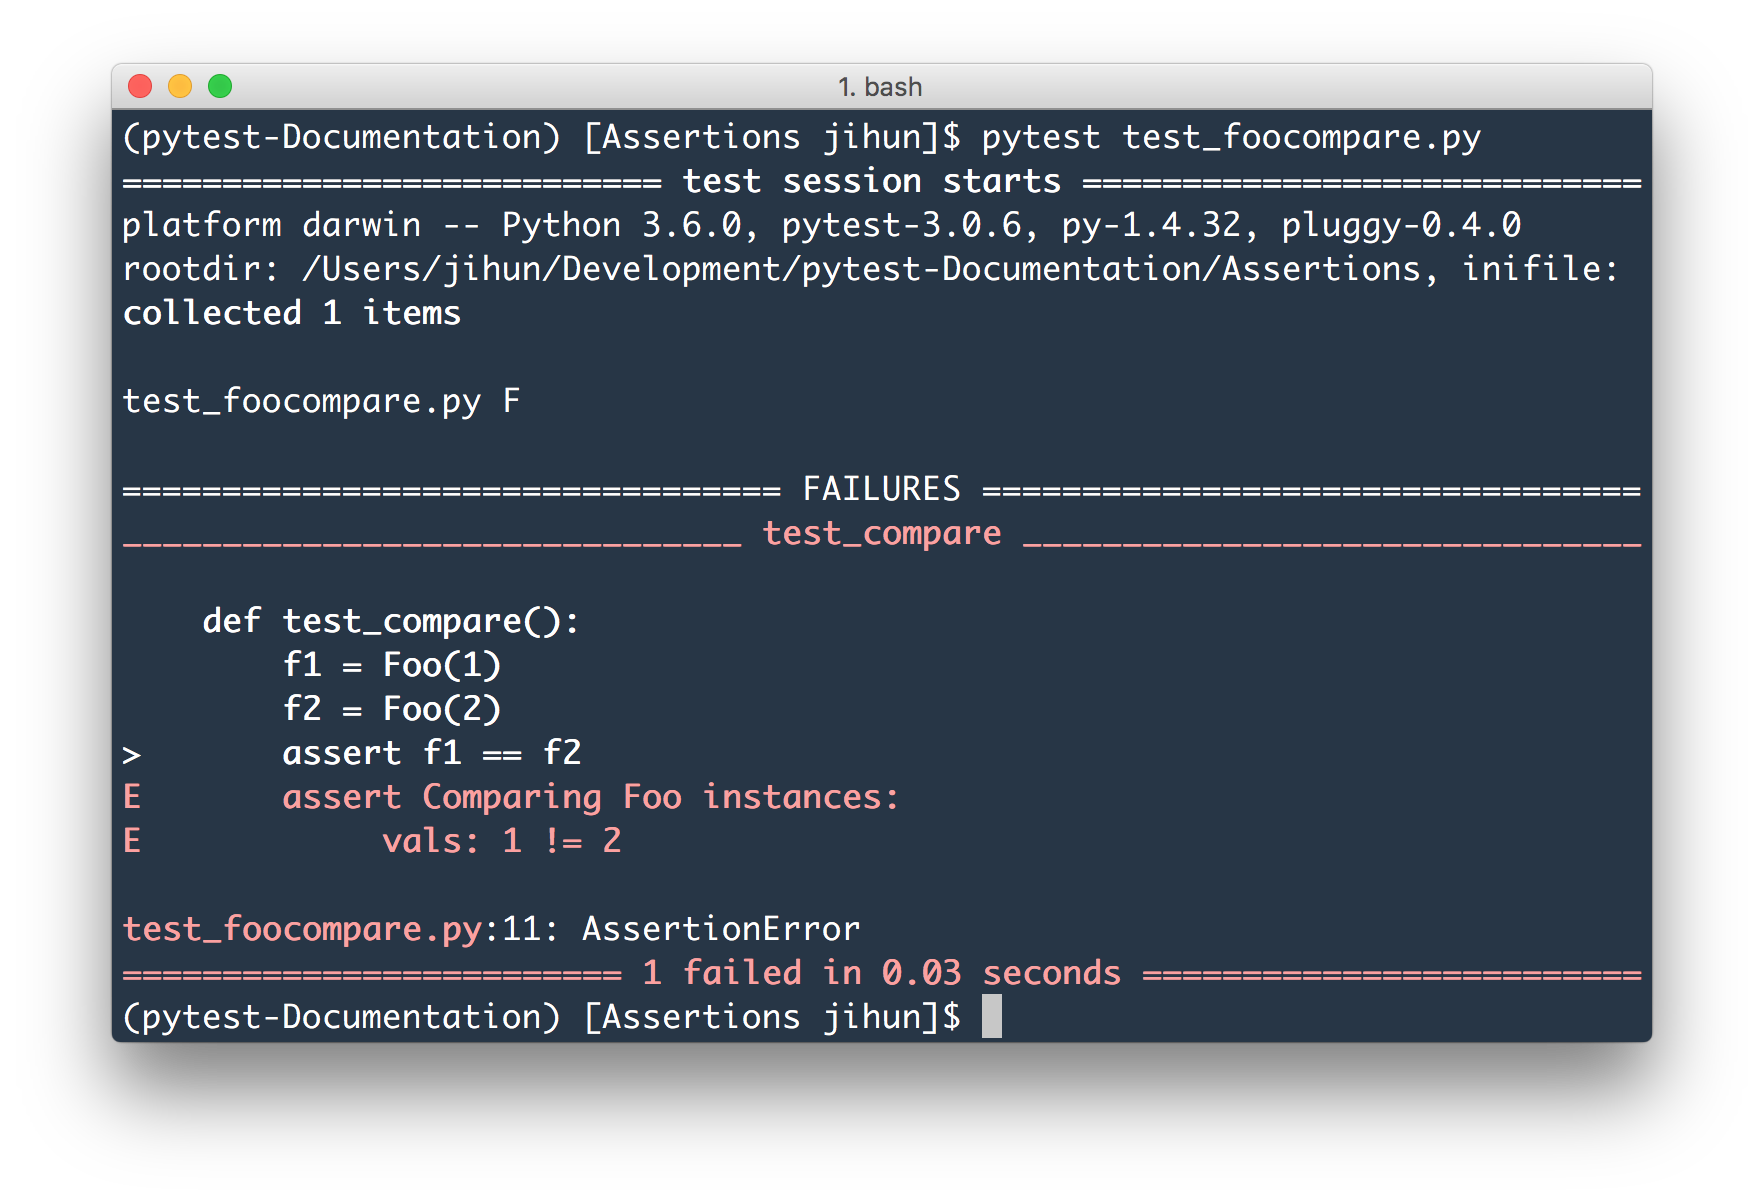
테스트 모듈을 실행시키면 conftest.py 에서 custom하여 정의한 결과를 얻을 수 있다.
